Imagine your computer is like a big TV, and sometimes it can’t show pictures correctly. That’s what happens when you see Error Code 22 on your computer. It means something’s wrong with the computer’s picture part, called the graphics card or its driver. This makes pictures and videos look funny or not show up at all.

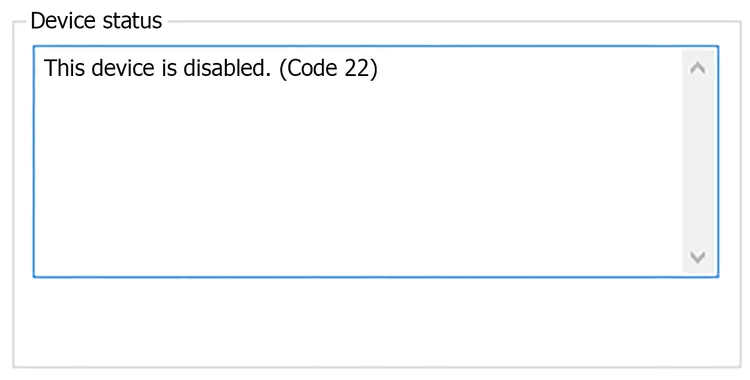
This device is disabled. (Code 22)This Graphics Device Driver Error Code 22 occurs because the computer’s picture part (the graphics card) and the instructions it gets (the driver) don’t work together well. It’s like if you tried to speak one language, and your friend only understood another. This mix-up can also happen when the driver is too old or when something else is wrong inside the computer.
This error could apply to any hardware device managed by Device Manager, regardless of the Windows operating system, be it Windows 11, Windows 10, Windows 8, Windows 7, Windows Vista, Windows XP, etc.
In this article, we have come up with all the effective & working solutions that can fix your Graphics Device Driver Error Code 22 problem. So, let’s take a look.
Fixed: Graphics Device Driver Error Code 22
In some cases, the error code 22 may be caused by a hardware problem with the graphics card itself & because of this, the computer screen may turn black. If you have tried all of the above solutions and the error persists, then try the below potential fixes;
- Restart your computer.
- Re-enable the graphics card driver in Device Manager.
- Roll back the graphics card driver to a previous version.
- Uninstall and reinstall the graphics card driver.
- Run the Windows System File Checker tool.
- Check for Windows updates
In case the problem still persists, then try the below potential fixes;
1. Use your keyboard to navigate to Device Manager
To fix your graphics device driver error code 22 on AMD and Windows, then try to use your keyboard to navigate to the device manager. To do this, just follow the below steps;
Step 1: Restart your PC.
Step 1: If you log in automatically, skip to step 3; otherwise, wait some time until you think the login screen appears, then (enter the password and) log in.
Step 2: On your keyboard, press Alt and F4 keys together a few times to make sure any startup programs get closed.
Step 3: Hold down the Windows key and press R to open the Run box.
Step 4: Type devmgmt.msc and press Enter to open Device Manager.
Step 5: Wait a few seconds to make sure Device Manager is open, then press the Tab key once to bring the selection onto the device list.
Step 6: Press D twice to go to the Display adapters category.
Step 7: Tab the right arrow key to expand the category, and tab the right arrow again to go to the first device under the category.
Step 8: Press Alt+A together to open the Action menu.
Step 9: Tab the down arrow key once to select Enable device (note, if you’ve got the wrong device, this will select Disable for that device). Then, press Enter to enable it.
Step 10: Voila! Your screen should appear normally now. If it isn’t working, you can press the power button to shut down and restart your computer, then carefully repeat the above steps to better troubleshoot the issue.
2. Update the Graphics Card Driver
To update the graphics card driver, you have to follow the below steps;
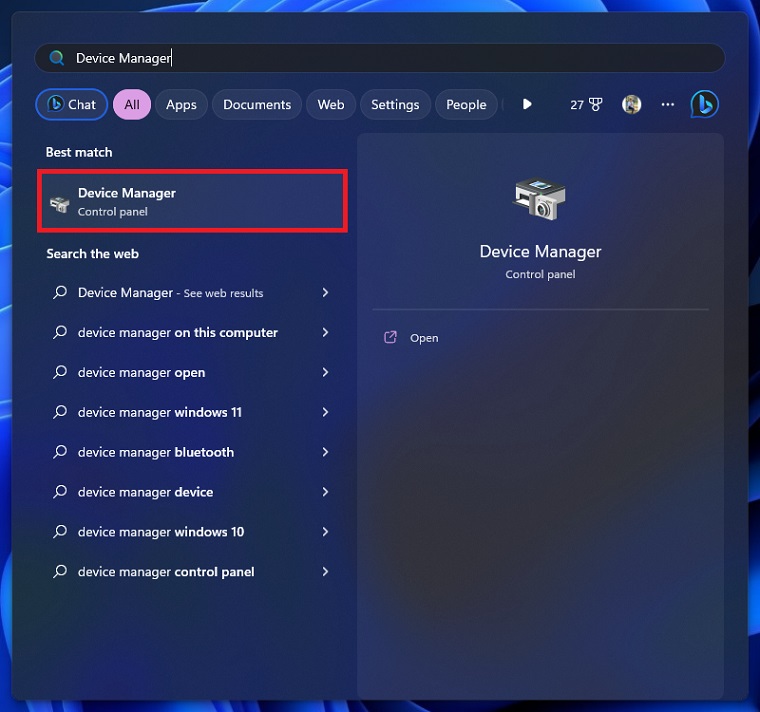
Step 1. Type Device Manager in your Windows search box and launch it

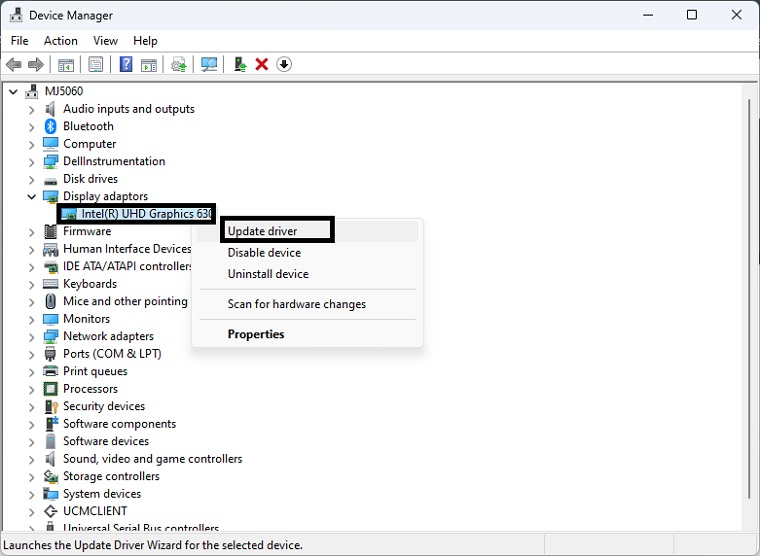
Step 2. Expand the Display adapter.
Step 3. Right-click on the device and select Update driver.

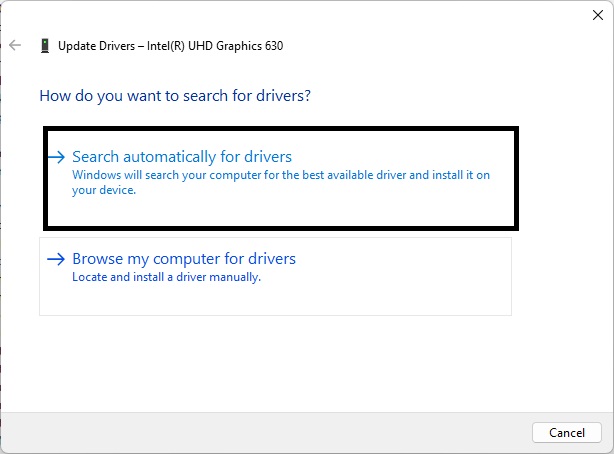
Step 4. Click Search automatically for updated driver software.

Step 5. Windows will search for an update and download it.
Once done, you can check whether you have fixed the issue.
There is a software that can automaically update your drivers quickly and efficiently called Driver Easy software. Unlike the device manager, it can update all drivers with a single click and has a broader database for detecting the latest drivers.
3. Update the BIOS
To update the BIOS, just follow the below steps;
Step 1: Check Your Current BIOS Version
- Restart your computer and observe the BIOS version during the startup process. Note it down.
Step 2: Identify Your Computer Model
- Determine your computer’s make and model; this information will be needed to find the correct BIOS update.
Step 3: Download the Latest BIOS Update
- Visit the manufacturer’s website for your computer or motherboard.
- Find the BIOS or firmware update section and download the latest version compatible with Windows 11.
Step 4: Prepare a USB Flash Drive
- Format a USB flash drive as FAT32 and ensure it has enough space to store the BIOS update.
Step 5: Copy BIOS Update to USB Drive
- Copy the downloaded BIOS update file to the root directory (not in a folder) of the USB flash drive.
Step 6: Backup Important Data
- As a precaution, back up any important data on your computer.
Step 7: Restart Your Computer
- Insert the USB flash drive containing the BIOS update.
- Restart your computer.
Step 8: Access BIOS Setup
- During startup, press the designated key (e.g., F2, F12, or Delete) to access the BIOS setup.
Step 9: Perform the BIOS Update
- Inside the BIOS setup, locate the section for updating the BIOS.
- Select the BIOS update file from the USB flash drive and follow the on-screen instructions to initiate the update. Do not interrupt this process.
Step 10: Restart Your Computer
- After the update completes, your computer may restart automatically. If not, manually restart it.
Step 11: Verify BIOS Update
- Re-enter the BIOS setup to confirm that the BIOS version has been successfully updated.
Step 12: Reset BIOS Settings (Optional)
- To ensure proper configuration, reset BIOS settings to their defaults. Look for a “Load BIOS Defaults” option in the BIOS setup.
Step 13: Completion
- Your BIOS is now updated, potentially bringing improvements and fixes to your system.
4. Clear CMOS
Clearing the CMOS can sort out your problem. To do so, just follow the below steps;
Step 1: Power Off Your Computer
- Shut down your computer completely and disconnect it from the power source.
Step 2: Open the Computer Case
- If you have a desktop computer, open the case to access the motherboard.
Step 3: Locate the CMOS Battery
- Look for a small, circular battery on the motherboard. This is the CMOS battery.
Step 4: Remove the CMOS Battery
- Carefully remove the CMOS battery from its socket. You can usually do this with your fingers or a small tool.
Step 5: Wait for a Few Minutes
- Leave the CMOS battery out of its socket for about 5-10 minutes. This allows the CMOS memory to reset.
Step 6: Reinsert the CMOS Battery
- After waiting, carefully put the CMOS battery back into its socket, ensuring it’s properly seated.
Step 7: Close the Computer Case
- If you open the computer case, close it securely.
Step 8: Reconnect Power
- Reconnect the power source to your computer.
Step 9: Power On Your Computer
- Turn on your computer. The CMOS settings will have been reset to their default values.
5. Change the Expansion Slot of Device
Move the device to a different expansion slot on the motherboard, assuming, of course, that the piece of hardware with the error is an expansion card of some kind.
If the Code 22 error is due to a lack of system resources available for the card, moving it to a different slot on the motherboard could clear up the problem. This isn’t as common a situation with newer hardware and Windows versions, but it is possible and is an easy troubleshooting step to try.
6. Replace the Hardware
A problem with the device itself might be the root cause of this error, in which case replacing the hardware is the next logical step.
If your computer hardware seems okay and is set up correctly, you can try fixing the computer by reinstalling Windows.
While not likely, another possibility is the device is incompatible with your version of Windows. You can always check the Windows HCL to be sure.
7. Remove or Reconfigure The Newly Installed Program
It is possible that the error occurred because you installed a new device or software that messed up the device manager settings and caused this error. Remove the software or device or reinstall it.


![Intuit QuickBooks Payroll Review [year]: Features, Prices & How it Works](png/intuit-quickbooks-payroll-review-features-prices-how-it-works-1-300x212.png)


![Best VPN Service in [year]: VPNs tested by our Experts](png/best-vpn-service-vpns-tested-by-our-experts-softlay-300x169.png)
